← back to the build document · projected dimensions
The build manual
The executable version of the whole document: everything to buy, with real part numbers and prices, and every step in the order it happens — so no step ever has to be undone to do a later one. Prices are the recommended-build column of §08; the sequence is §11; install detail comes from the research corpus (FarOutRide, Engineers Who Van Life, DwnShifters) read against this platform. Nothing here is new — it is the same build, arranged so you can execute it.
The rules that generate the whole build
- Holes before insulation. Every penetration of the composite skin — windows, fans, heater exhaust, A/C exhaust, wire glands, shore inlet — happens while the walls are bare. Cutting a finished wall wrecks insulation and finish in the same stroke.
- Weight gates before money gates. Four CAT-scale weighs — as-delivered, post-strip, post-systems, finished — and each one is a go/no-go on the next spending phase. The estimates have run ~120 lb optimistic twice in a row against measured data.
- Bonds cure on the calendar, not on enthusiasm. 3M 08115 gives 90 minutes of working time, 4 hours clamped, 24 hours to full strength. Every bonded stage has a hard wait built in.
- Buy the tools before the first cut. FarOutRide's #1 do-differently after 1,000 build hours: hundreds of cuts on a drill and a jigsaw was a mistake. The $2,000 tool line is in the budget on purpose.
- The factory rulebook overrides guesses. GM publishes upfitter bulletins for exactly this work — airbag/no-drill zone maps, the 12 V disconnect procedure, the sanctioned way to tap accessory power. All nine BrightDrop bulletins are archived, studied and translated into rules on the bulletins page →. Three of them are now standing rules: no penetration finalizes without a 191c zone check (Math Data request for anything close), every electrical session starts with the 190b disconnect (including the 13.5 V maintenance-mode trap), and every van-side 12 V tap uses the 188d/196b factory provisions — never a spliced circuit.
The shopping list
Every line is the recommended-build spec from §08, grouped by subsystem. Items marked order first are the long-lead parts — all of Phase 0's procurement. Conversion total: $43,226 + 20% contingency = $51,871. Every line below is vendor-shopped with live prices and direct order links on a dedicated page: the parts list, where to buy →
Electrical & solar — budgeted $13,260; tracking well under it
The rows below now carry real paid prices where hardware has been bought, and estimates everywhere else. The house bank and the entire Victron core are in hand: $2,194.54 (LiTime LT148307) + $2,102.16 (Voltaico #27279). Vendor-shopped, this group projects $2,010.38 still to spend — see the parts list for the line-by-line. The $13,260 heading is the original planning envelope, not a live number.
What is not yet bought and matters: the Class T 250 A fusing and 24 V sub-block ($263.71, Nomadic), the Blue Sea 8099 AC panel (~$307), 1/0–2/0 cable and lugs (~$260), the panels themselves ($537) and their rack (no design exists). None of the bought hardware can be installed until the licensed one-line is signed. It stays in boxes.
The research doc argued 48 V (§05); the build is going 24 V. That decision now has to survive the rooftop A/C selection instead of leaning on the old under-bench Velit assumption. What changes: inverter DC current doubles to ~210 A at full output, so the inverter runs step up to 4/0 cable and the Class T to 400 A; the bank becomes 6 × 24 V 100 Ah modules in parallel; the DC-DC drops to a cheap Orion 24/12. What does not change: the 250/60 MPPT, shore side, and most other subsystems. What must be re-run: the final panel count and harvest once the rooftop A/C, fans and service clearances are placed.
| Item | Price | Notes |
|---|---|---|
| ✅ BOUGHT — 2 × LiTime LiHeat 24 V 230 Ah self-heating — 11.78 kWh (was: 6 × Epoch 100 Ah, 15.36 kWh) | $2,194.54 | Order first. Heated cells are non-negotiable — no engine heat exists on this platform to save a cold pack. Est. pricing; confirm heated 24 V SKUs at order. |
| ✅ BOUGHT — Victron MultiPlus-II 24/3000/70-50 120 V UL (was: 24/5000) | $837.52 | Single 120 V leg, 2,400 W continuous. DC branch is ~125–140 A, not ~210 A — so 1/0–2/0 cable, not 4/0. Binding condition: the Bosch ES4 water heater cannot run alongside the 1,800 W induction hob. Delete it, make it shore-only, or hard-interlock it. |
| ✅ BOUGHT — Victron SmartSolar MPPT 250/60-Tr | $365.57 | Three panels in series hit ~142 V at −10 °C — the 150/45's 150 V ceiling is a destroyed controller. The 250 V input is the safety margin. |
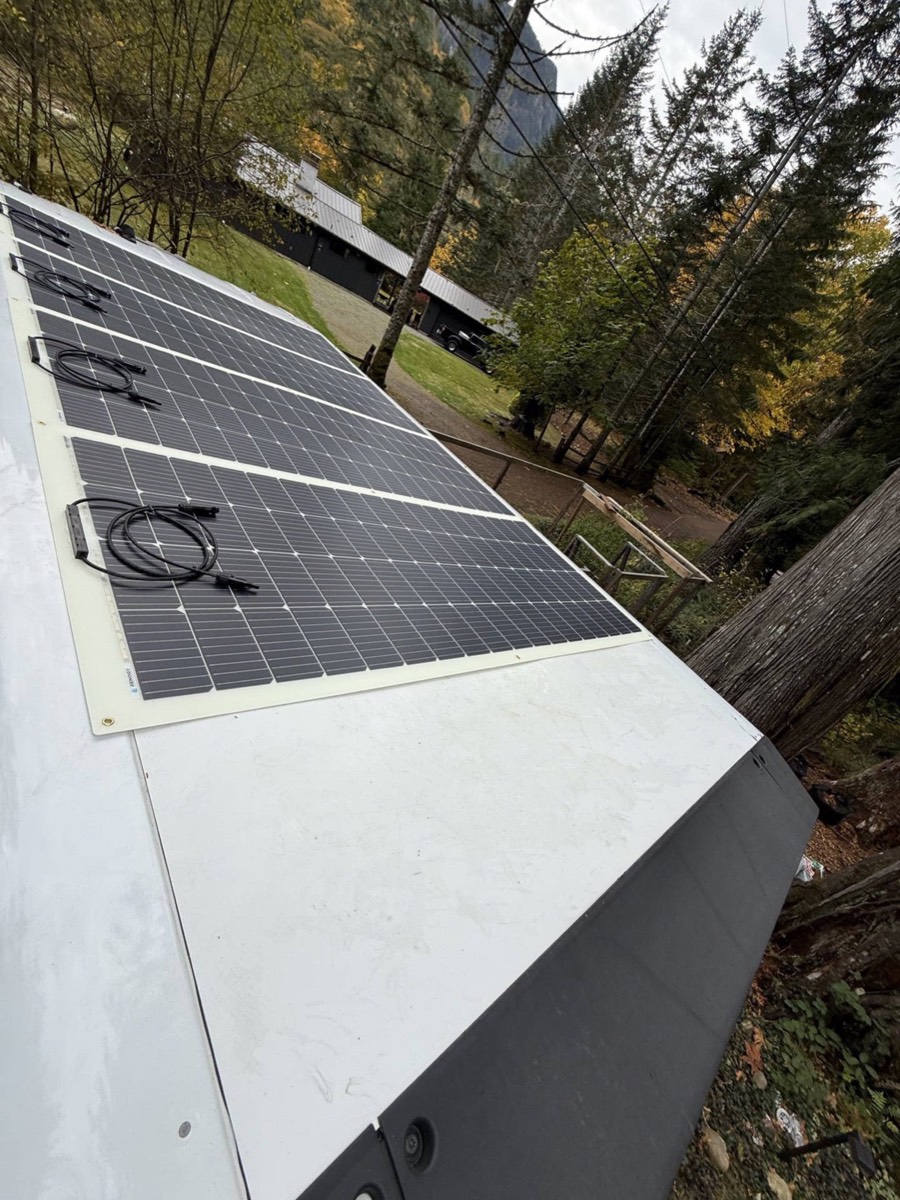
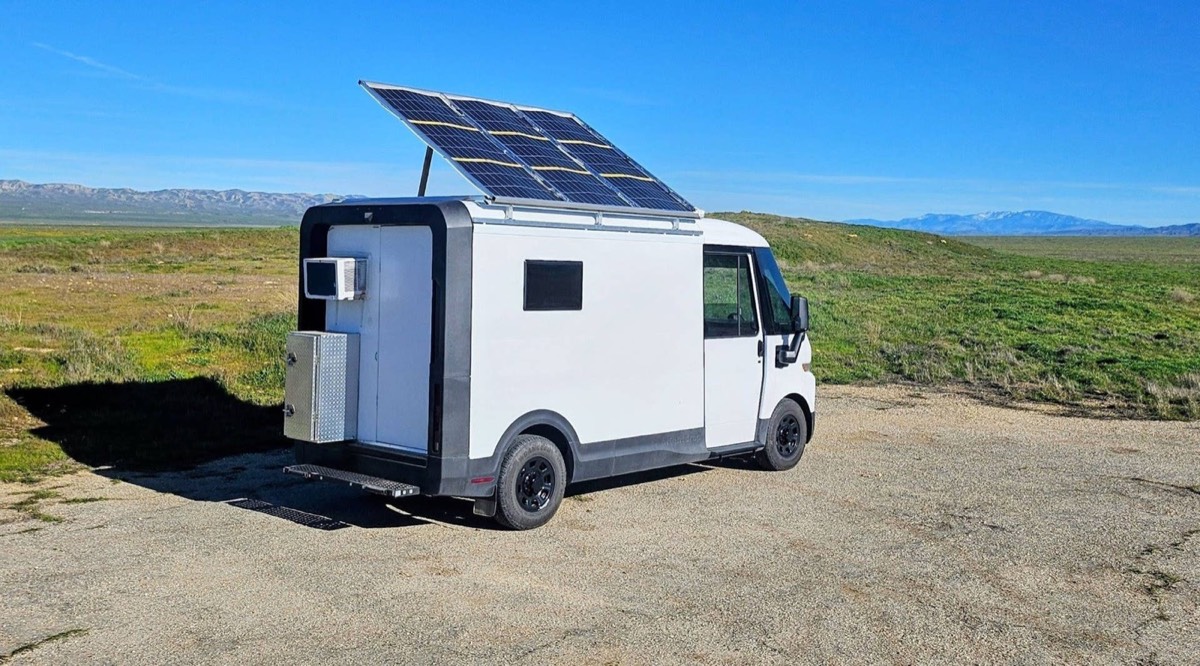
| 3 × ~440 W panels + roof rack | $1,480 | Panels bought. Rack is gutter-mounted slotted channel with catalog strut fittings; quantities and the aluminium quote still open. |
| Rooftop A/C — exact SKU pending | $2,100 placeholder | Do not order yet. Re-run roof layout, energy model, voltage impact and service clearance before selecting the unit. |
| ✅ BOUGHT — SmartShunt 500 A + Orion-Tr 24/12-30A isolated | $253.47 | Bank monitoring + the 12 V rail for fans, pump, lights. Sized up from 20 A — fan, pump, heater start and lights overlap. |
| ✅ BOUGHT — Cerbo GX MK2 + MK3-USB-C + 2 × VE.Direct (GX Touch 50 not bought) | $314.15 | Runs headless over the free Android GX Wi-Fi Display app. Needs one RJ45 patch cable for VE.Bus to the inverter — any CAT5e off the shelf. The GX Touch 50 is a $184.93 open decision. |
| Class T 250 A ×2 + blocks, Lynx Distributor M10 (✅ bought, $195.64), MEGA fuses (✅ bought, $117.81), 24 V sub-block, AC panel, 1/0–2/0 cable + lugs | $313.45 bought + ~$1,008 left | Order first. Re-sized off the 24/3000: ~125–140 A on the inverter branch — 1/0–2/0 inverter runs, 250 A Class T (the LiTime BMS trips at 200 A, so 400 A was never doing anything). AC side is a Blue Sea 8099 — 30 A main plus four branch positions; the 8077 was main-only and left every branch unprotected. The one line where cutting cost produces a fire in a metal box you sleep in with two animals. |
| NEMA 14-50 inlet, shore cord, TT-30 + 15 A adapters | $350 | |
| 12 V fuse panel, lights, fans, pump wiring | $400 |
Climate — heat side — $3,050
| Item | Price | Notes |
|---|---|---|
| Espar Airtronic S3 D2L 2.2 kW diesel air heater | $1,400 | A 20 °F night costs ~0.4 gal of diesel, ~$1.60, and ~0.3 kWh. The electric equivalent is ~14 kWh — the whole bank. Combustion heat is the only option that works here. |
| Spare clone heater, shelf stock | $200 | Many parts interchange. Better redundancy than a second install. |
| Spare glow plug + fuel dosing pump | $120 | The two parts that actually fail. |
| Aux diesel tank 5–10 gal, lines, rear-overhang mount | $450 | Cannot go under the floor between the axles — HV territory. |
| 2 × MaxxFan Deluxe 7500K | $600 | Order first. Two fans buy the 110" longitudinal sweep. |
| Ducting, thru-hull, muffler, exhaust wrap | $200 | Ducted low along both sides. |
| 2 × CO detectors | $80 | One low, one at sleeping height. Installed before the first light-off, not after. |
Shell — insulation, glazing, cutting — $5,116
| Item | Price | Notes |
|---|---|---|
| Polyiso + Thinsulate SM600L + sound deadening, ~485 sq ft | $1,500 | Effective R-7 through a ribbed body. Every HVAC number in the document is computed on this row — $400 saved on foam is paid back in diesel and A/C duty cycle forever. |
| 4 × windows — 2 × Arctic Tern 550×700 + 2 × 450×500 | $2,836 | Order first. Phase 4 is the critical path; these wait for nothing. |
| 4 × VanMade insulated window covers | $480 | Worth more R-value than upgrading the glass, for a tenth of the price. |
| Aluminum sub-frame stock, 3M 08115, edge seal, blades | $300 | Order first. The 1.6 mm composite skin cannot carry a window load unreframed. |
Plumbing, bath, cabinetry, appliances — $16,300
| Item | Price | Notes |
|---|---|---|
| Water system — tanks, Remco Aquajet ARV pump, heater, manifold, two filtration chains | $5,400 | Locked spec: 16 gal fresh, ~22 gal grey, every tank inside. There is no undermount option on this platform. |
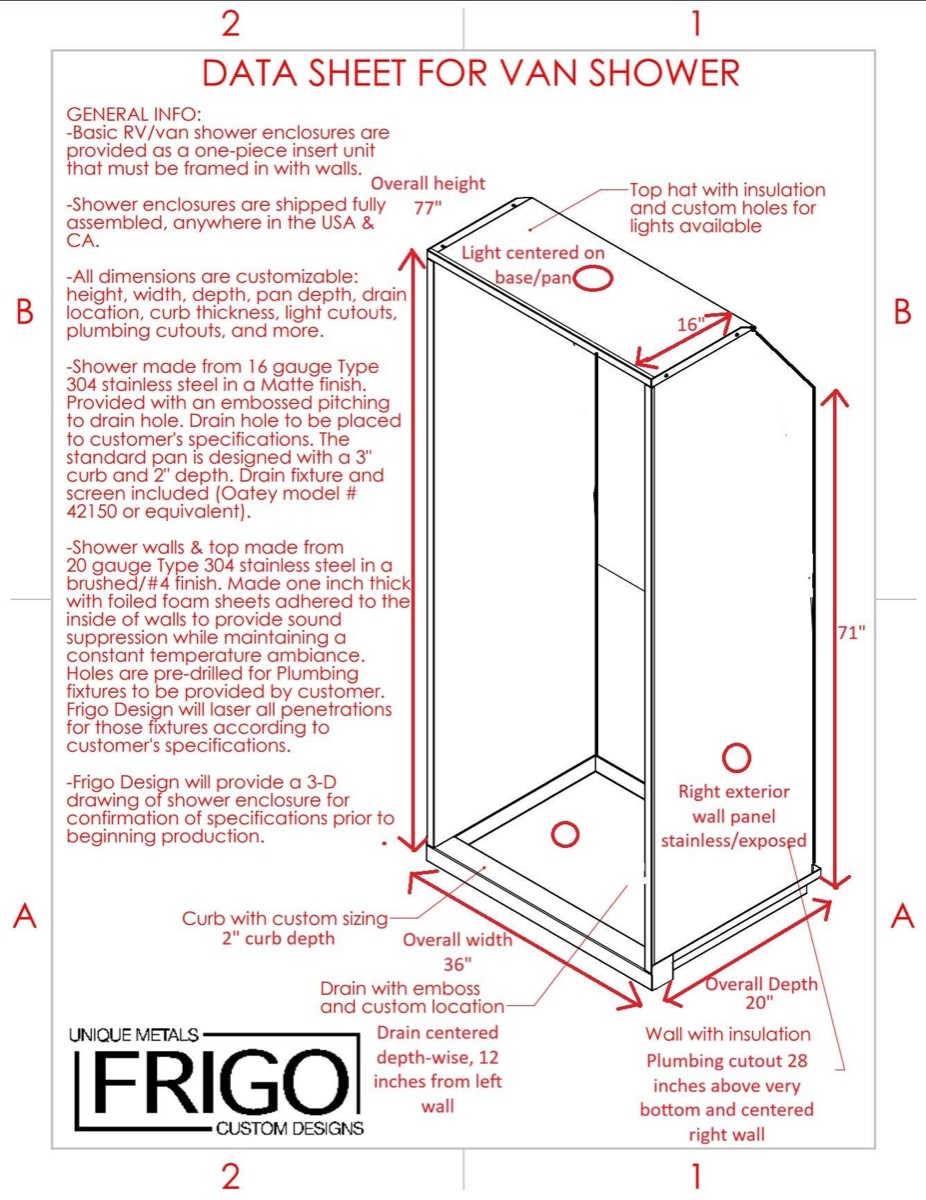
| Wet bath — pan, surround, HepvO traps, ventilation | $1,700 | The weight audit made outdoor-shower + cassette the baseline. The bath bay is held as storage; bathroom is last-in-if-at-all. Decide at the Phase 2 freeze. |
| Composting toilet | $1,100 | |
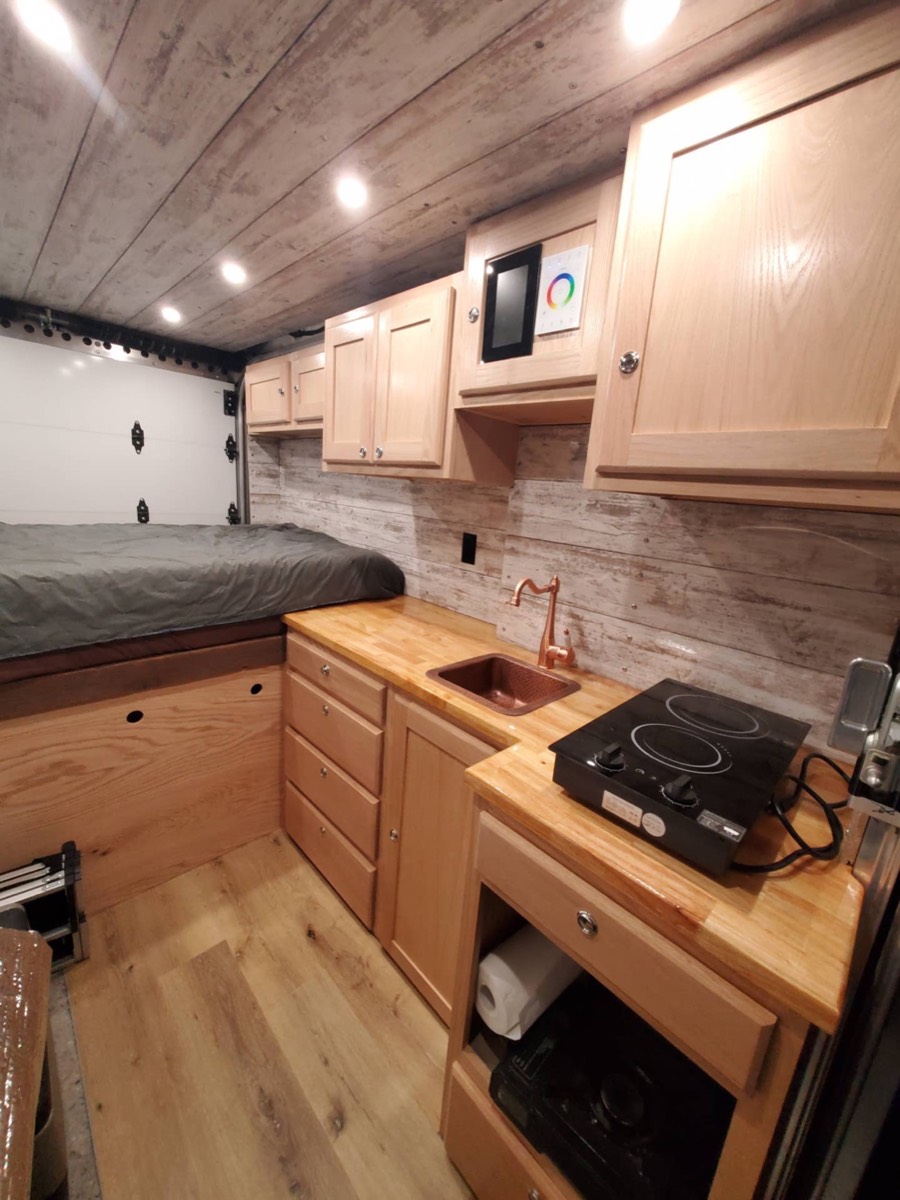
| Cabinetry, framing, flooring, wall panels, upholstery | $5,500 | Aluminum extrusion, not lumber — ~20% more money, 100+ lb less mass, and that trade wins every time at a 2,310 lb ceiling. Includes Ranger Design 6550-BZL track + tie-downs. |
| Appliances — 12 V compressor fridge, induction hob, sink | $2,600 | All-electric kitchen. No propane anywhere in the build. |
Everything else — $5,500
| Item | Price | Notes |
|---|---|---|
| Pet safety — MarCELL (Verizon) + Waggle Pro (AT&T/T-Mobile) + subscriptions + thermostatic fan circuit | $600 | A life-safety system, not an accessory. The OEM app is dead — there is no remote climate and no fallback. Both monitors have internal batteries so they keep reporting after the house bank fails. |
| Connectivity — Starlink Roam + hardware, cell booster | $1,200 | |
| Tools | $2,000 | See the tool list below. |
| RV title, registration, weight certificate, insurance setup | $600 | Skip this and the $52K of installed systems is uninsured. |
| Charging kit — portable 32 A L2 EVSE, 50 A EMS, GM-approved CCS adapter, extension, adapters | $1,100 | Order first. Charging is the daily constraint from day one; the EMS protects the onboard charger at the first sketchy pedestal. |
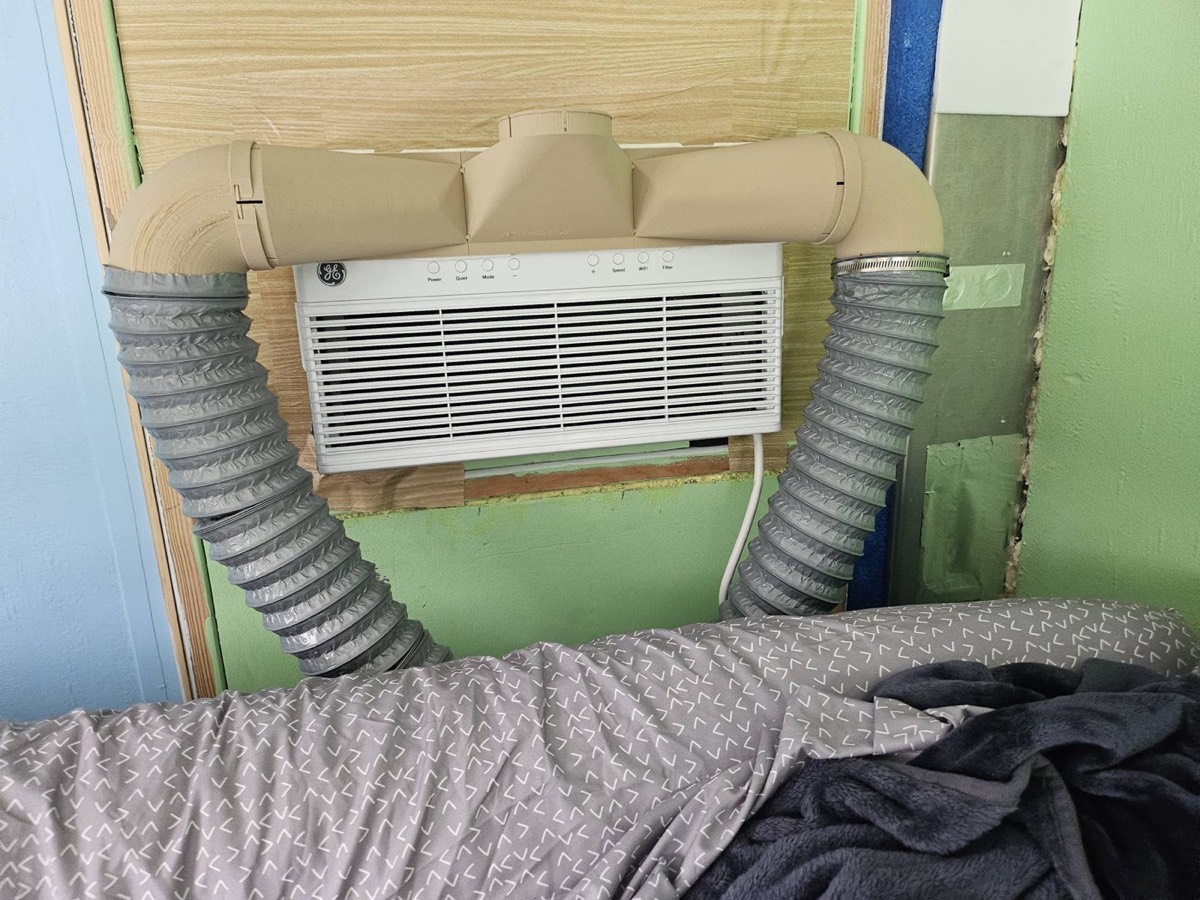
The old BOM carried the RecPro 48 V 13.5K as a placeholder — that unit is 48 V-only and drops out at 24 V. The Velit 2000U under-bench (12/24/48 V variants) is now the pick by default, priced above at its 24 V spec. The architecture was already settled and doesn't move: under-bench, not rooftop — the roof stays clear for all 1,350 W of solar. Duct its condenser path in Phase 4.
The full 15.36 kWh bank (a four-module 10.2 kWh bank = 15 hours of hot-summer autonomy — not enough). The 250/60 MPPT. Heated cells. Class T fusing and correctly sized cable. A real diesel heater with a spare on the shelf. Two CO detectors. Two cellular pet monitors on two carriers. Full insulation. The 20% contingency — it is not padding and you will spend it. Safe to cut instead: Cerbo GX, extra bank capacity beyond 15.36 kWh, side solar, countertop RO, Arctic Tern glass (AM Auto sliders save ~$1,400).
The tool list
Assume a first-time builder buys most of it — $2,000 in the budget, and the research is unanimous that buying it up front beats improvising:
- Track saw — sheet goods and straight panel cuts; the single most-regretted omission in the corpus
- Jigsaw + fine-tooth metal blades — window and fan apertures in 1.6 mm composite skin
- Step bits + hole saws — glands, thru-hulls, pass-throughs
- Router — edge work on paneling and countertops
- Hydraulic crimper + quality stripper — every 24 V lug; a bad crimp at 210 A is a hot joint
- Rivet gun + rivnut tool — blind fastening into body members you can't back
- Torque wrench + thread-locker — "your camper van is going to go through an earthquake a day"; every bolt gets both
- Multimeter + DC clamp meter — commissioning and every 2 a.m. diagnosis afterward
- Clamps, more than seems reasonable — every 08115 bond wants 4 hours of clamp pressure
The build, phase by phase
Measure (0–1) → decide and freeze (2) → cut every hole (3–4) → close the envelope (5–6) → power, heat, water (7–9) → furniture and safety (10–11) → prove it (12) → make it legal (13) → leave (14).
Before the van moves anywhere
- Photograph the certification jamb label and the yellow FMVSS reduced-capacity label; file them with the buyer's order. These two photos govern the whole build.
- Confirm commercial-vehicle insurance is active — it titles as a commercial step-van until Phase 13, and RV insurers will not touch it yet.
- Get written confirmation from a GM commercial dealer on parts, software support and open recalls for the VIN. Production ended 21 Oct 2025; get it in writing before money goes into the box.
- Line up covered workspace with 240 V power — bonding has temperature windows, and an EV without a plug is a daily logistics problem.
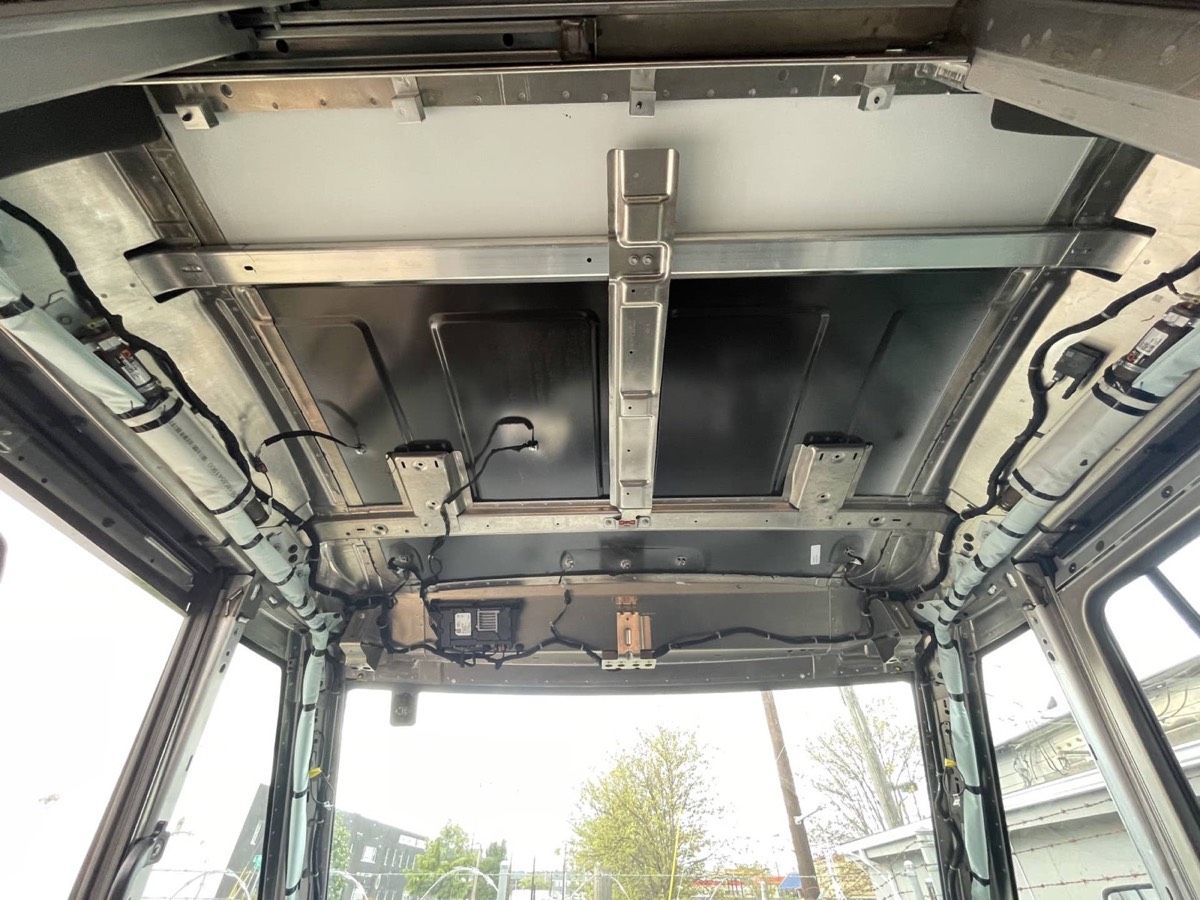
- Download the 25MY body builder manual no-drill zones and HV routing; print the underbody exclusion maps and the UI bulletin 191c airbag/no-drill diagrams. Every hole in Phases 4 and 8 gets checked against both.
- Submit a Math Data (CAD) request to GM Upfitter Integration for the 600's airbag zones, sensor/antenna locations and harness runs — bulletin 191c says its own diagrams are reference-only, and the request is free. Lead time unknown, so it goes in now, not at the design freeze.
- Photo-document the van's condition on arrival (bulletin 192c's delivery-inspection discipline) — every panel, the roof, the cargo box — before the first modification, while in-transit or dealer-prep damage is still claimable.
Delivery week — measure before you believe anything
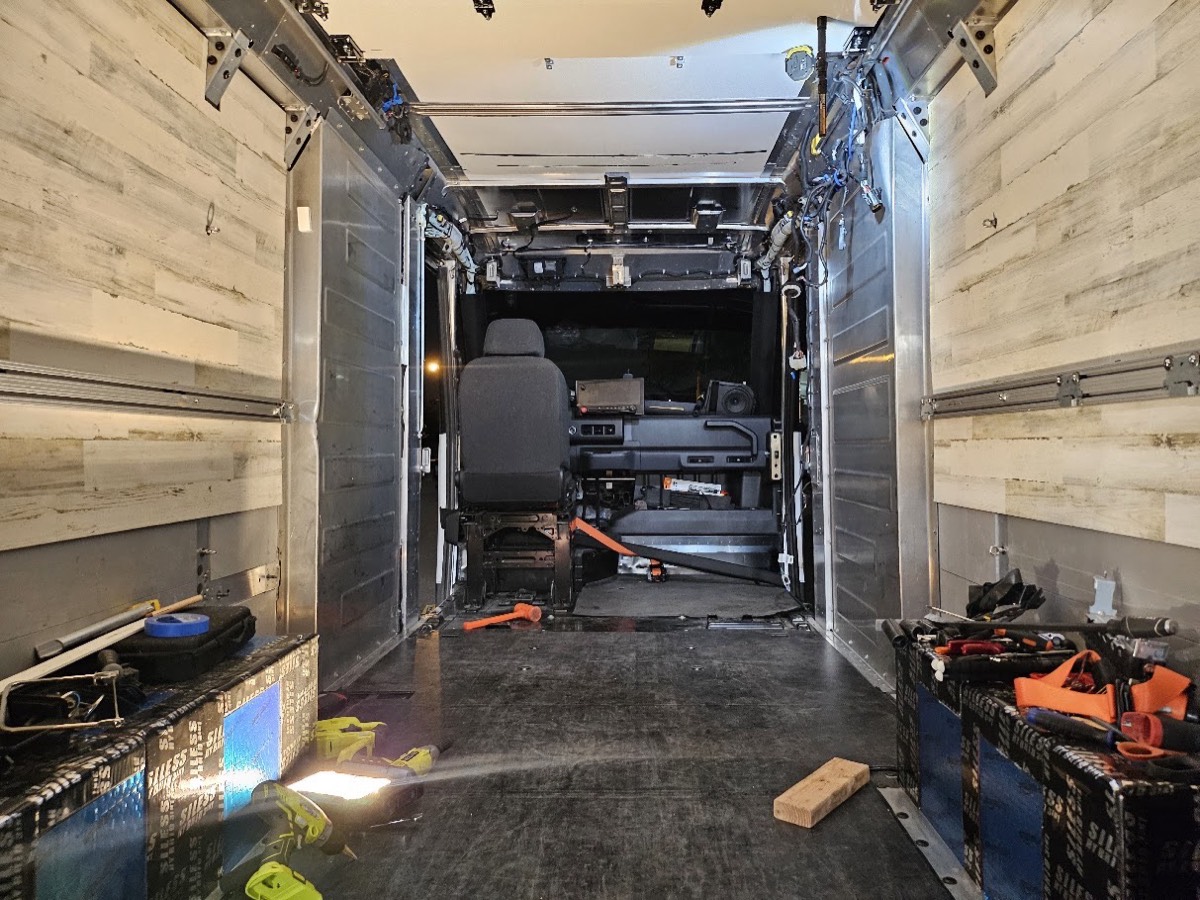
- ✅ CAT scale, as delivered — DONE 2026-09-07 (Fuel City Saginaw, CAT #2162, ticket 1216226250659): steer 4,640 / drive 4,660 / gross 9,300 lb with both occupants (330 lb) aboard → 8,970 lb van-only, Adrian Steel shelving still in. That's 450–1,150 lb over spec curb depending on trim — the strip-out delta (weigh gate 2) is now the number that matters. GVWR code confirmed C7E / 11,000 on the vehicle, so headroom at this weigh: 1,700 lb to GVWR, 651 lb front GAWR, 1,512 lb rear GAWR — the front axle caps anything mounted forward. Full analysis + ticket:
research/weigh-ins.mdin the repo. Weigh gate 1 closed. - Strip the upfit — shelving, rails, partitions; patch and seal the abandoned holes.
- CAT scale, stripped — same scale (Fuel City Saginaw #2162, for comparability), same charge state. Weigh gate 2 — next up. Ticket 2 − 9,300 = what the strip actually returned; the 416 lb FMVSS deduction is assumed to come back, not known.
- Battery health check — charge to 100%, run a measured highway leg, log kWh dispensed vs indicated SoC. The charging plan assumes 173.3 kWh useful; verify it on this pack.
- One DCFC session at a working 150 kW+ station — confirm the 80–95 min 10→80% figure, and that fast charging works at all before you're 400 miles from home.
- Hose-test the bare van — even new vans leak, doubly true on a low-volume commercial body. Find water paths before insulation hides them.
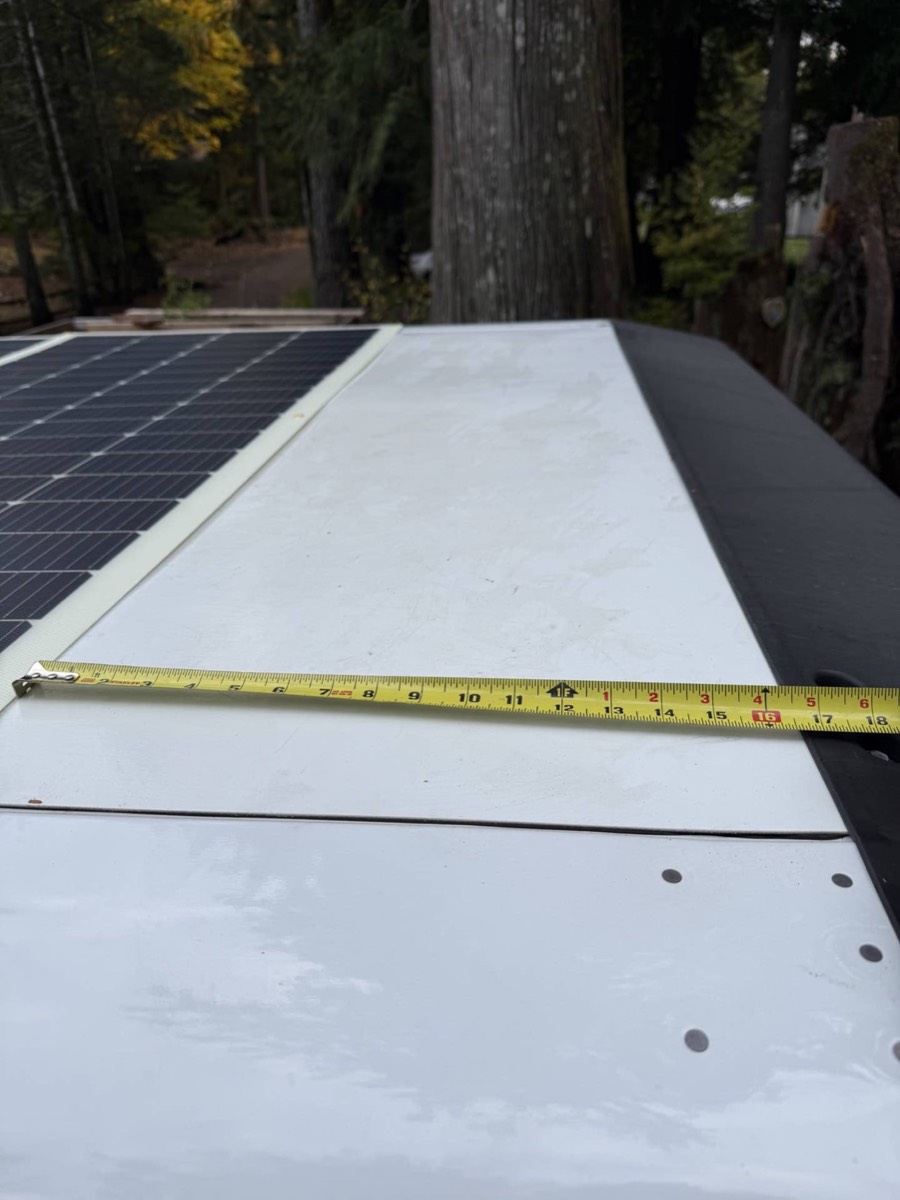
- Inspect the roof at intended fan/solar locations; verify the M8 rain-gutter studs and solid (non-CC4) panel sections against this van, not the manual.
Design freeze
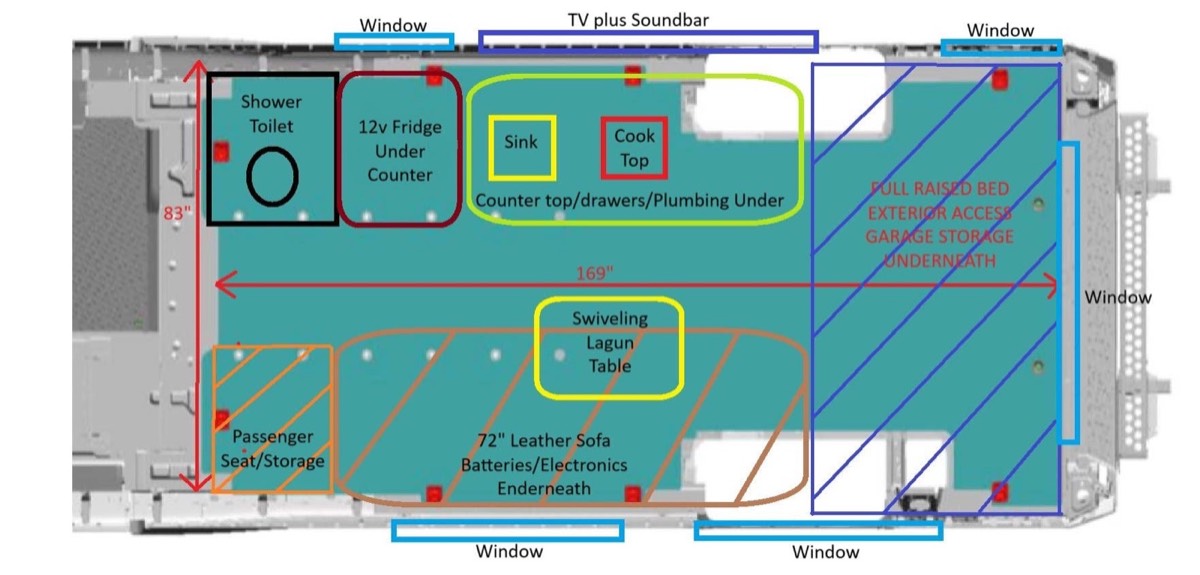
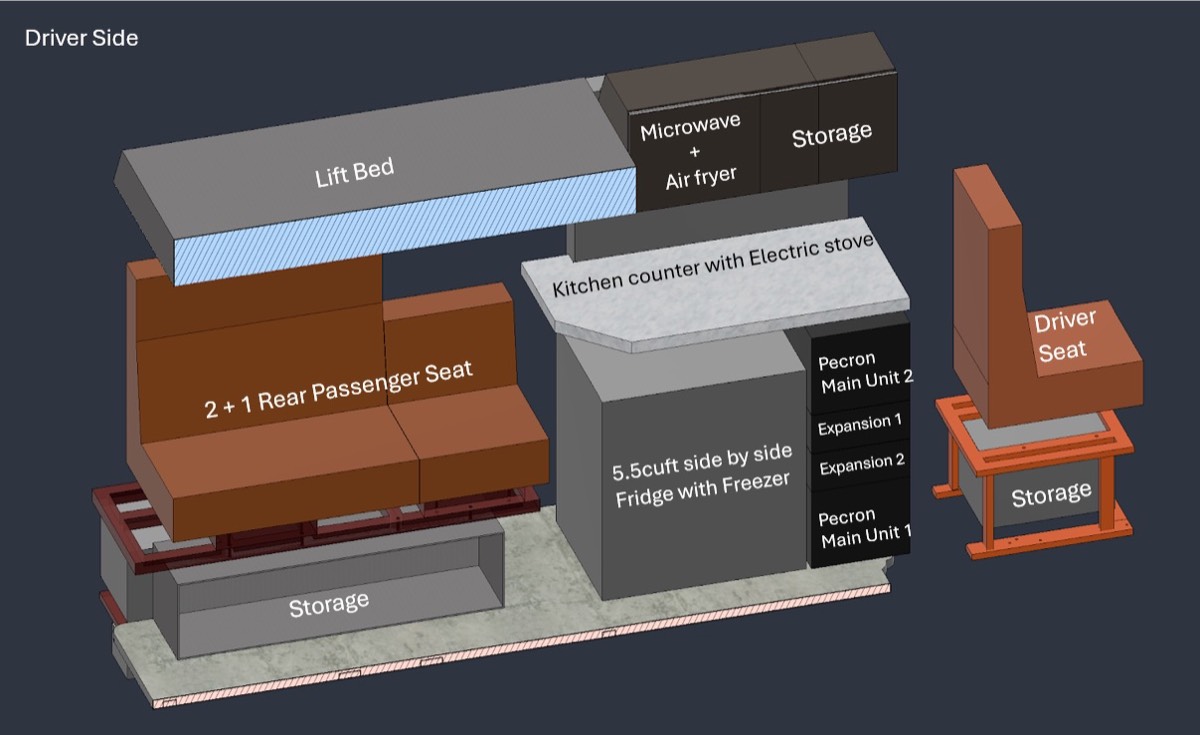
Run the SKU weight rebuild with the Phase 1 scale tickets as input. Then decide on paper and stop deciding: Plan C geometry with the bath bay held as storage · 16 gal fresh / ~22 gal grey · under-bench A/C (lock the unit here) · Espar S3 D2L · the §05 one-line diagram unchanged. Every cut in Phase 4 comes off this frozen drawing. A change after freeze costs a re-audit of the weight budget, by rule. Plan the whole interior at full scale — stopping at hand-drawn layouts was the self-declared most amateur mistake in the research corpus.
Shell prep
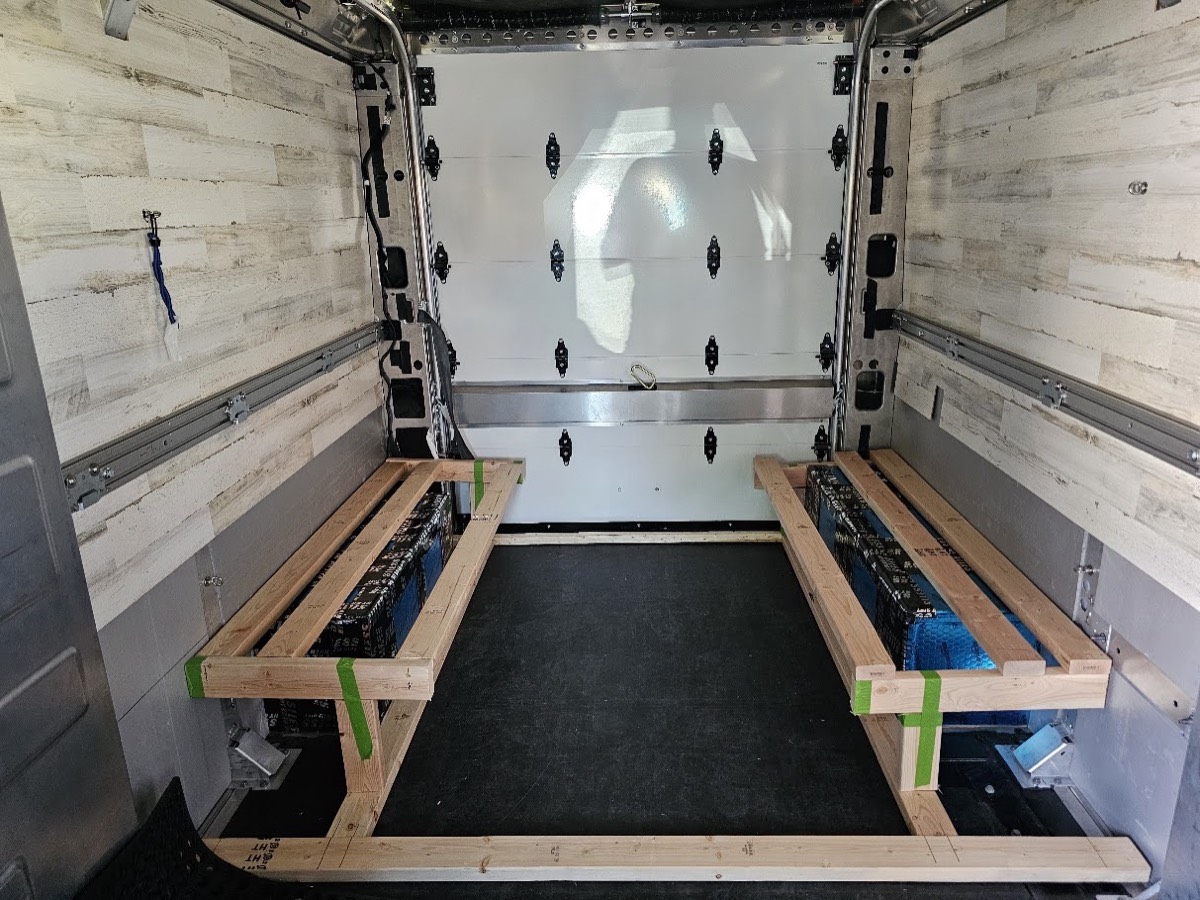
Degrease and scuff every bond area. Map every rib, no-drill zone and HV route from the printed maps onto the actual walls in tape. Dry-fit the floor deck, window sub-frames and fan garnish rings. Template every penetration in cardboard and tape it in place. Walk the layout at full scale — this is the cheapest day of the entire build to find a problem.
Holes — every penetration, while the walls are bare
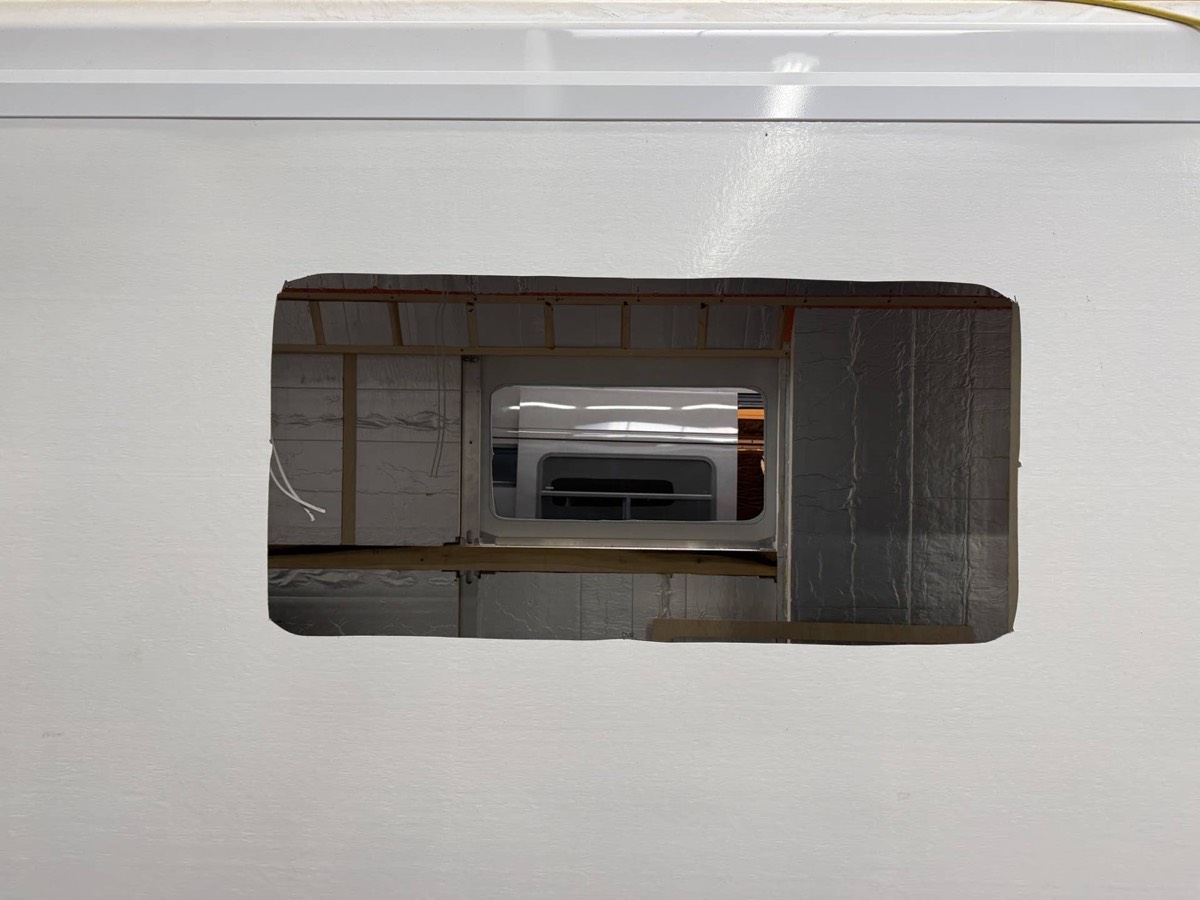
- Windows: bond aluminum sub-frames with 08115 (glass-bead bond line for thickness control), then set the windows into the frames. 4 hr clamped, 24 hr before glazing.
- 2 × MaxxFan: solid roof sections only, never CC4. Tape the area, cut to the cardboard template with a fine-tooth jigsaw blade, file the edge, frame the aperture, bond, seal — butyl under the flange, self-leveling lap sealant over every screw head. 24 hr before loading.
- Heater exhaust + combustion intake: thru-hull low on the body, clear of the underbody exclusion zones on the printed maps.
- A/C exhaust + condensate: the under-bench unit ducts condenser air out through the floor or a lower side panel — cut and seal that path now, plus the condensate drain.
- Shore inlet + glands: NEMA 14-50 inlet and every antenna/monitor gland, drilled and sealed now.
- Solar mounts: M8 rain-gutter studs only — zero new roof holes for the array.
Insulation
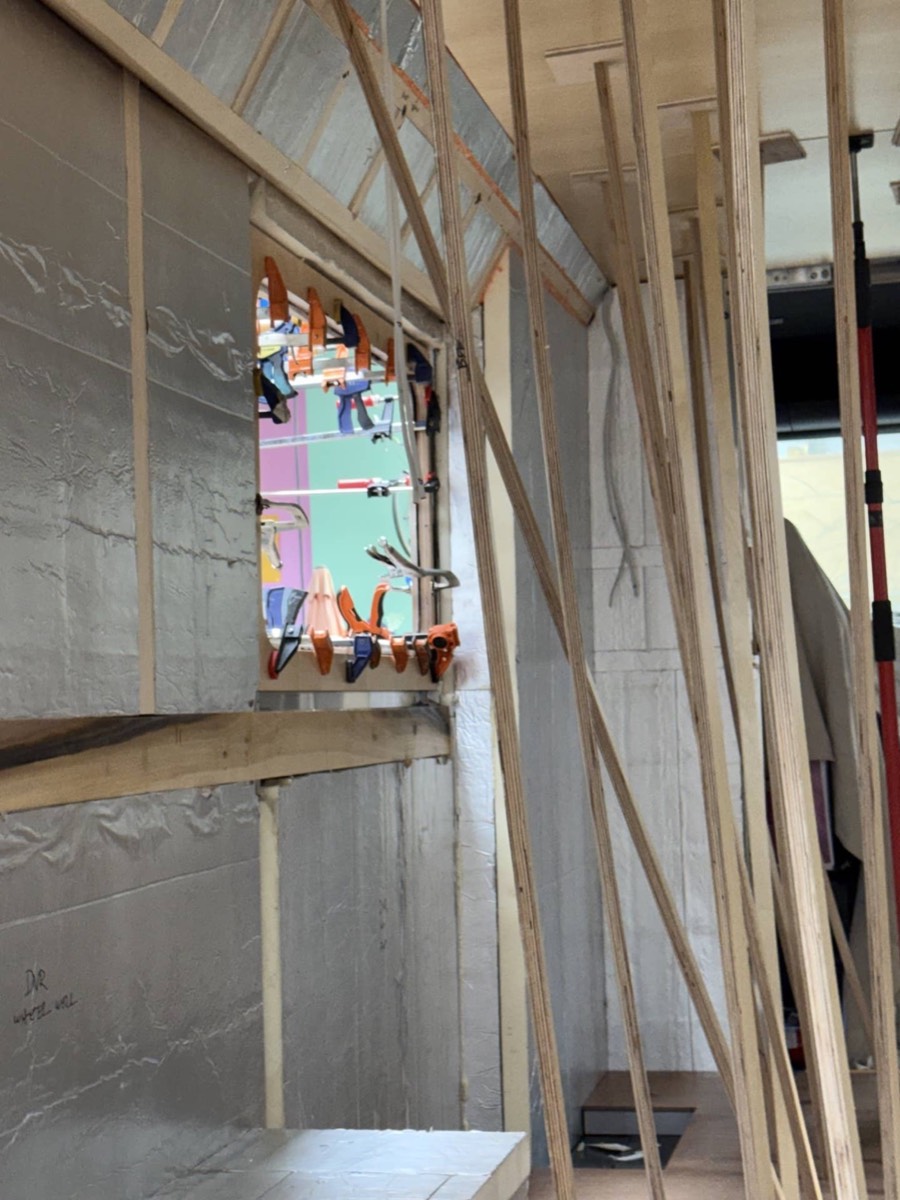
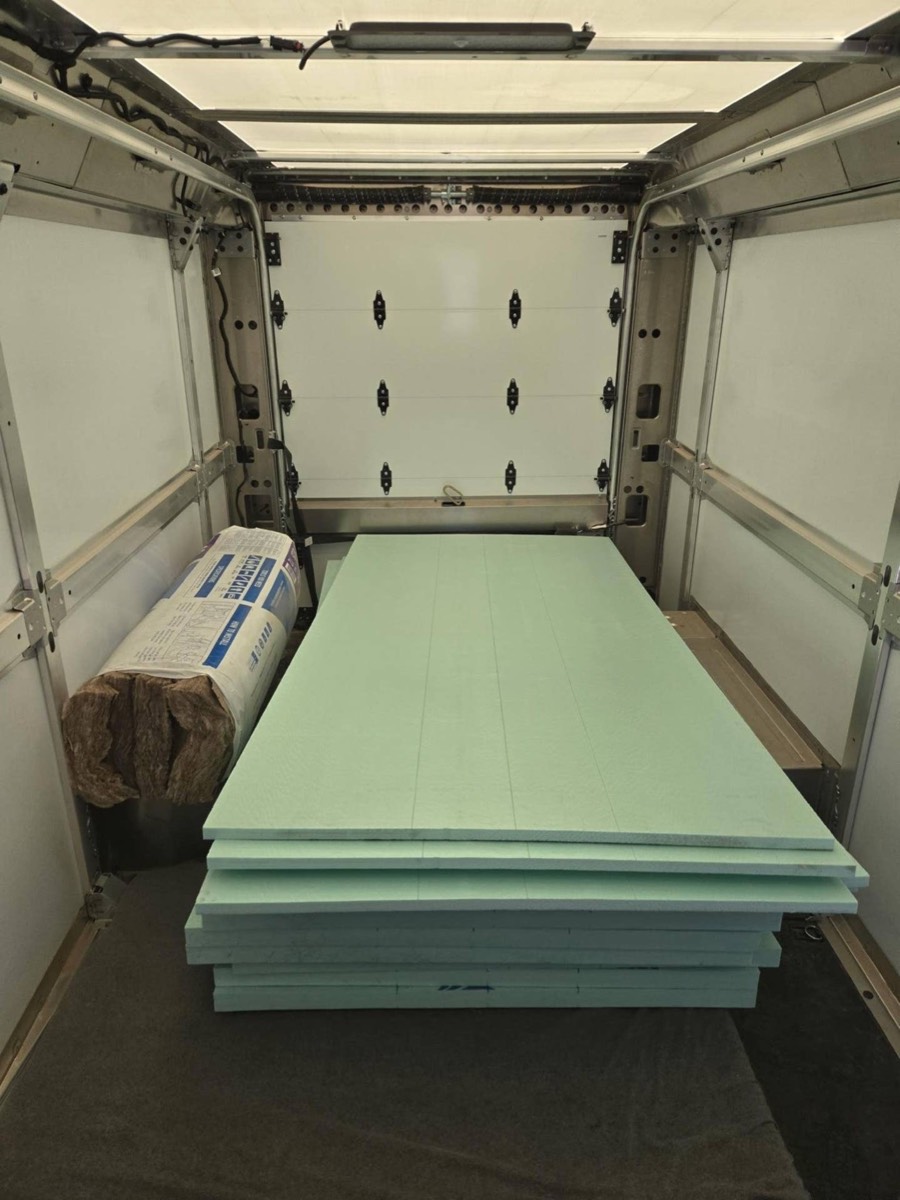
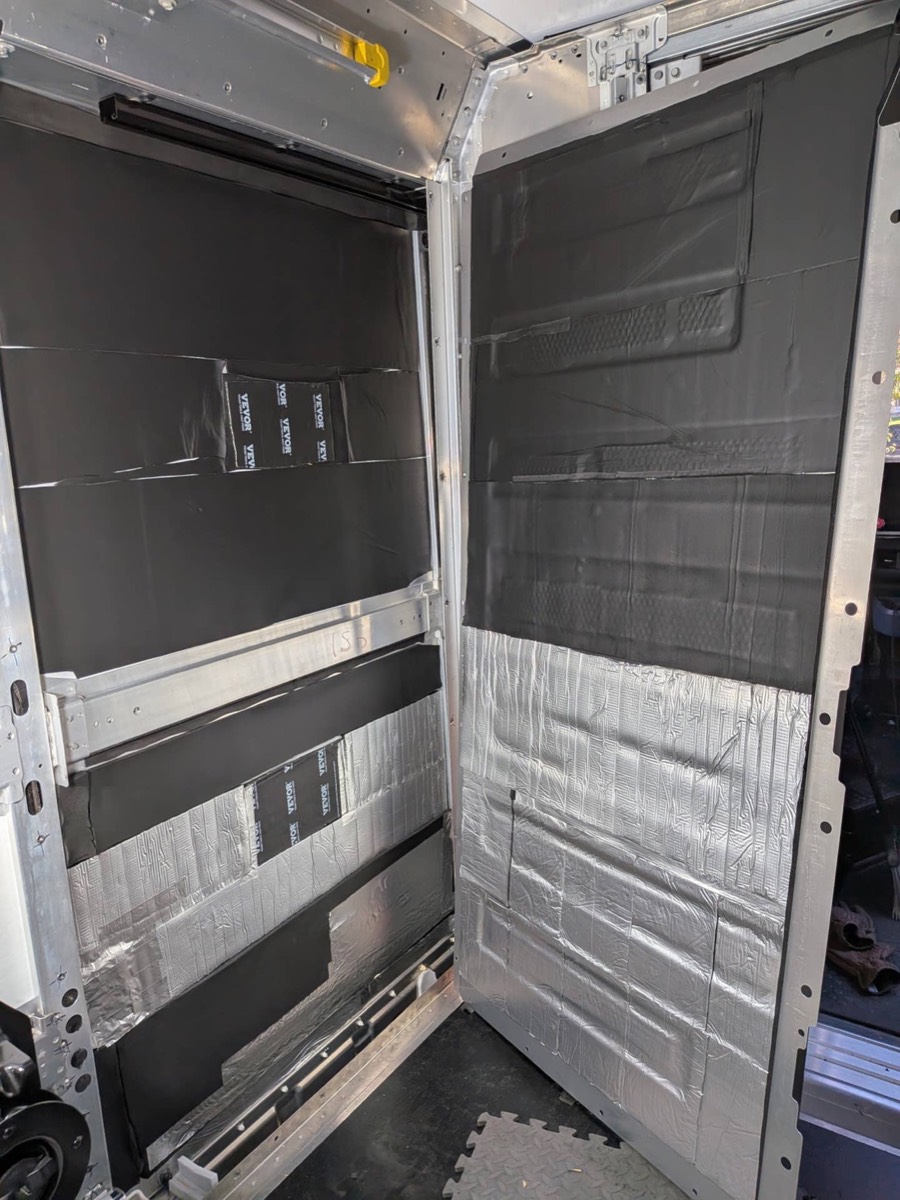
To a genuine effective R-7 — over the ribs, not just between them. The ribs are thermal bridges; insulating only the bays leaves a radiator grid in the wall. Polyiso on the flats, Thinsulate SM600L on curves and rib returns, closed-cell foam strips over exposed ribs, nylon washers under bolts that would bridge. No vapor barrier, ever — condensation on cold metal can only be managed, not eliminated, so the assembly stays vapor-open where it needs to dry. Avoid fiberglass, denim, spray foam, and Reflectix-as-insulation. ~485 sq ft, ~63 lb in the audit.
The floating floor
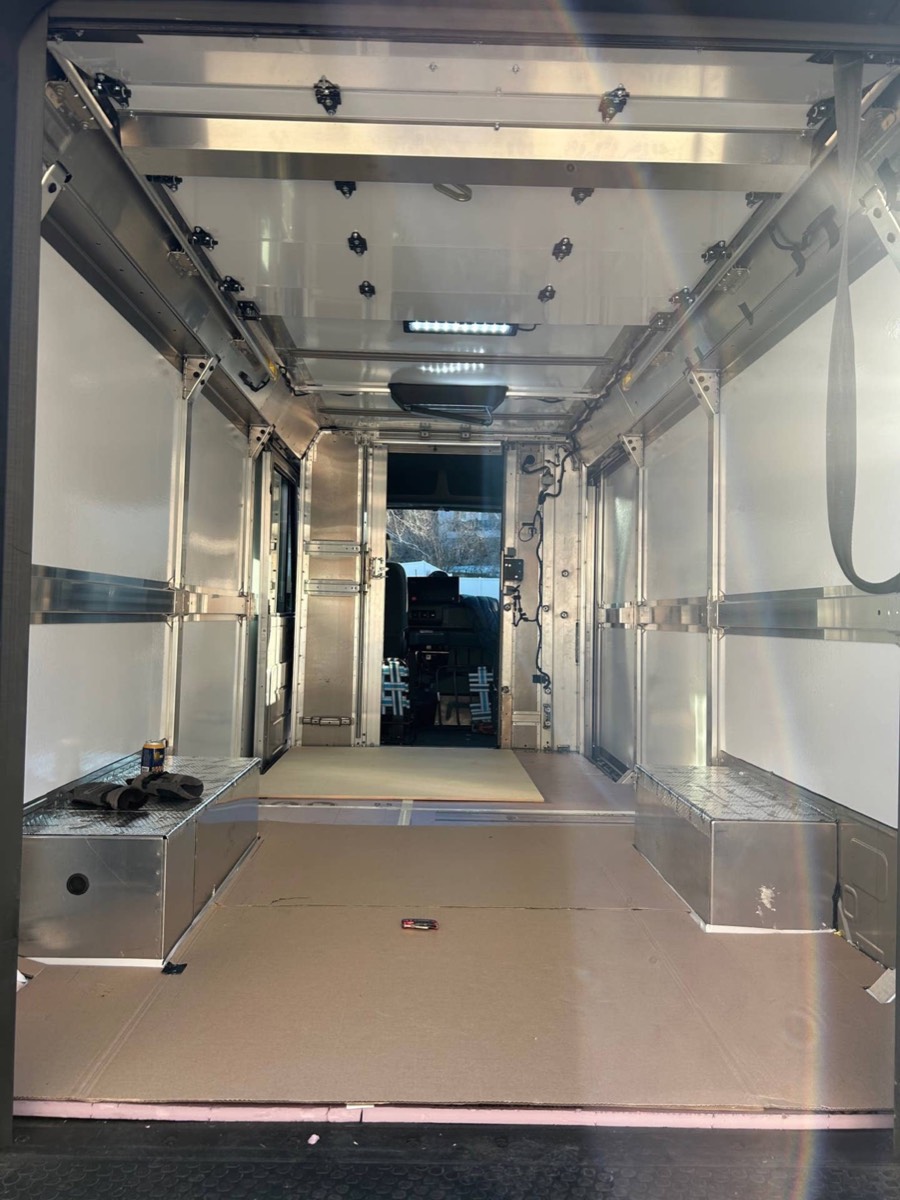
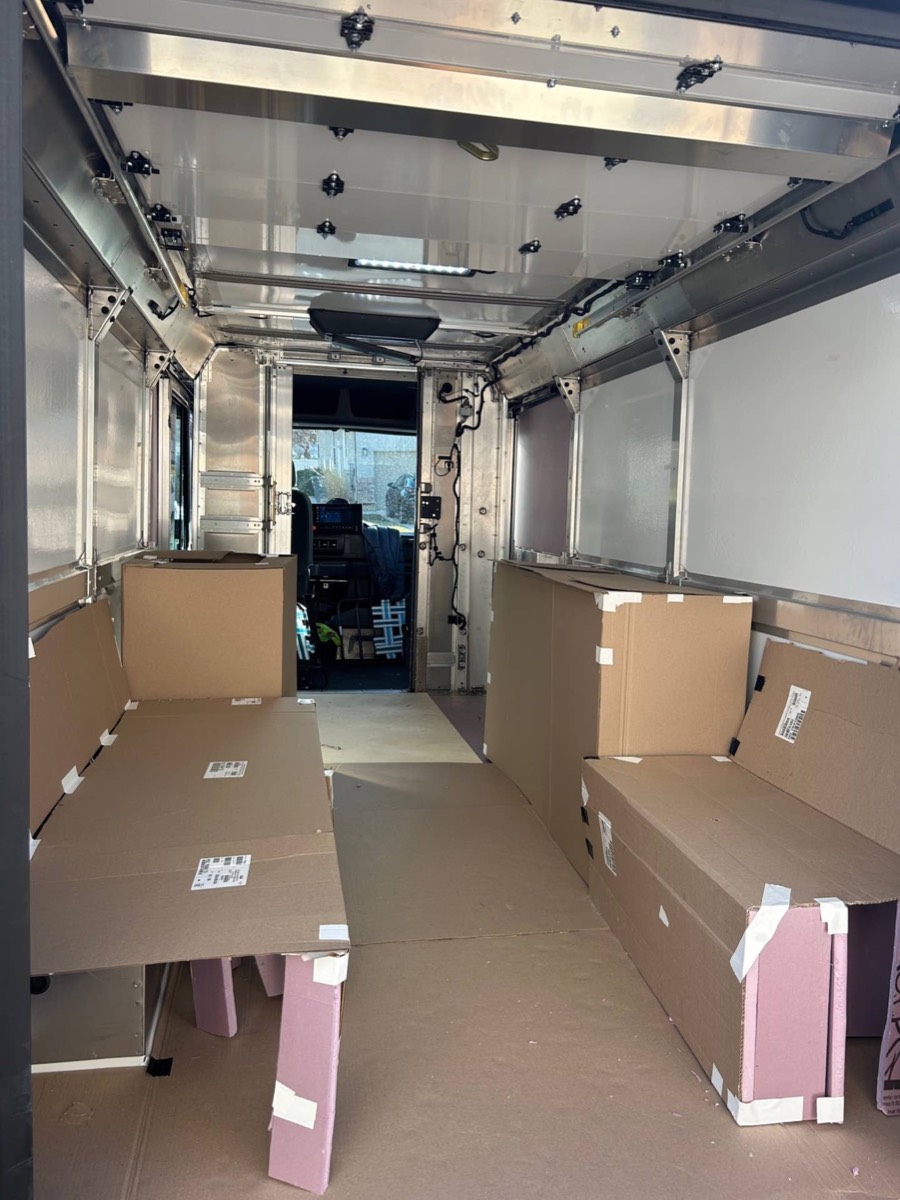
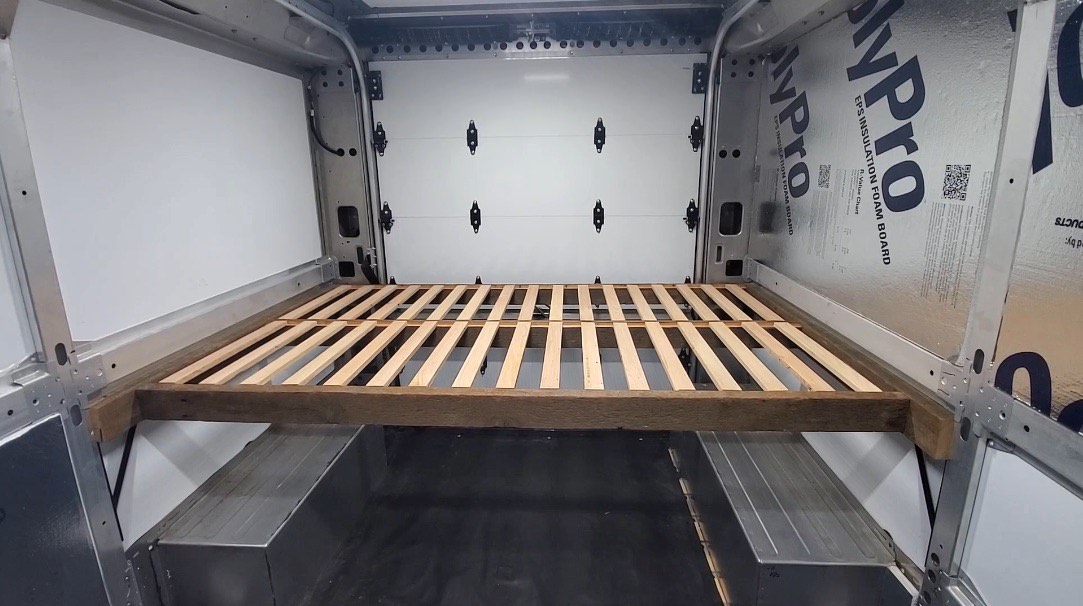
Zero fasteners through the floor at any point — the Ultium pack owns the underfloor. The deck floats: wall framing traps it laterally, bonded aluminum cleats (08115) at the bulkhead and rear sill trap it fore-aft. Insulated floor is a non-negotiable. Cleat bonds get the full 24 hr cure before the deck is walked on.
Electrical
- Every session touching the van's 12 V side starts with the bulletin 190b disconnect: ignition off, key out, meter the 12 V battery first — 13.5 V+ means Battery Maintenance Mode is live and the HV charger is energizing the cables; wait it out. Engage the HV service lockout and pin it. Disconnect the negative at the monitor-module stud only (unplugging the module = 4-hour relearn); re-torque grounds to 9 N·m.
- Van-side 12 V taps use the factory provisions only — the 188d battery/ignition circuit add or the 196b (9L7) blunt-cuts by the park brake (2 × 30 A relay-controlled + 10 A run-mode). DC-DC enable keyed to RUN, the water-heater/induction interlock signal, and any door-state trigger all ride these; nothing splices into an existing harness.
- Bench-commission the whole system before installing it: 2 × LiTime 24 V 230 Ah in parallel (equal-length paralleling cables) → 250 A Class T per battery → Lynx Distributor M10 → MultiPlus-II 24/3000 → single 120 V leg into a Blue Sea 8099, SmartShunt on the bank, Orion-Tr feeding the 12 V panel. Prove it works on a bench where mistakes are cheap.
- SmartSolar 250/60-Tr on the final roof array — panel count pending rooftop A/C layout; the 250 V input window is what makes cold-Voc safe if three panels remain viable.
- Set the MultiPlus AC input current limit to 8–16 A so the house is happy sharing one pedestal leg with the van's EVSE.
- Wire the A/C circuit to the max-mode draw, not a surge multiplier.
- Run everything possible on DC — fridge, fans, lights, pump, router. An idling inverter burns 10–30 W around the clock; that's real amp-hours overnight.
- Torque every lug, thread-locker on every bolt, label every wire, and tape the printed one-line diagram inside the electrical cabinet. You must know this system cold at 2 a.m. in Wyoming — that's why this row never gets outsourced.
- Then mount the panels, fly the array, and verify harvest on a real day.
Heat
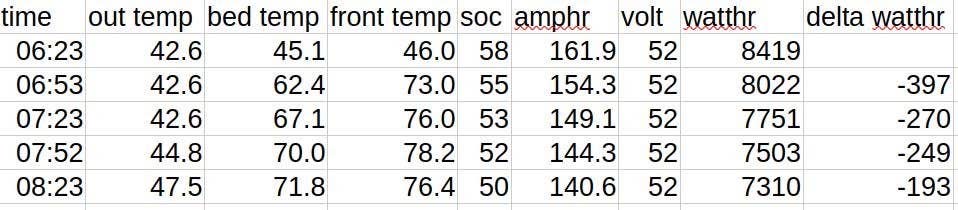
Espar Airtronic S3 D2L, 2.2 kW: 5 gal aux diesel tank in the rear box (12 nights at 0.41 gal per 20 °F night), fuel line and dosing pump per spec, ducting low along the floor where the heat is needed, dedicated fused circuit. Both CO detectors live before the first light-off. Run the full high-elevation burn-in, then put the $200 clone heater on the spare shelf. A shop that does Espar installs daily is worth paying for this one — the fuel-system work is the least forgiving part.
Water
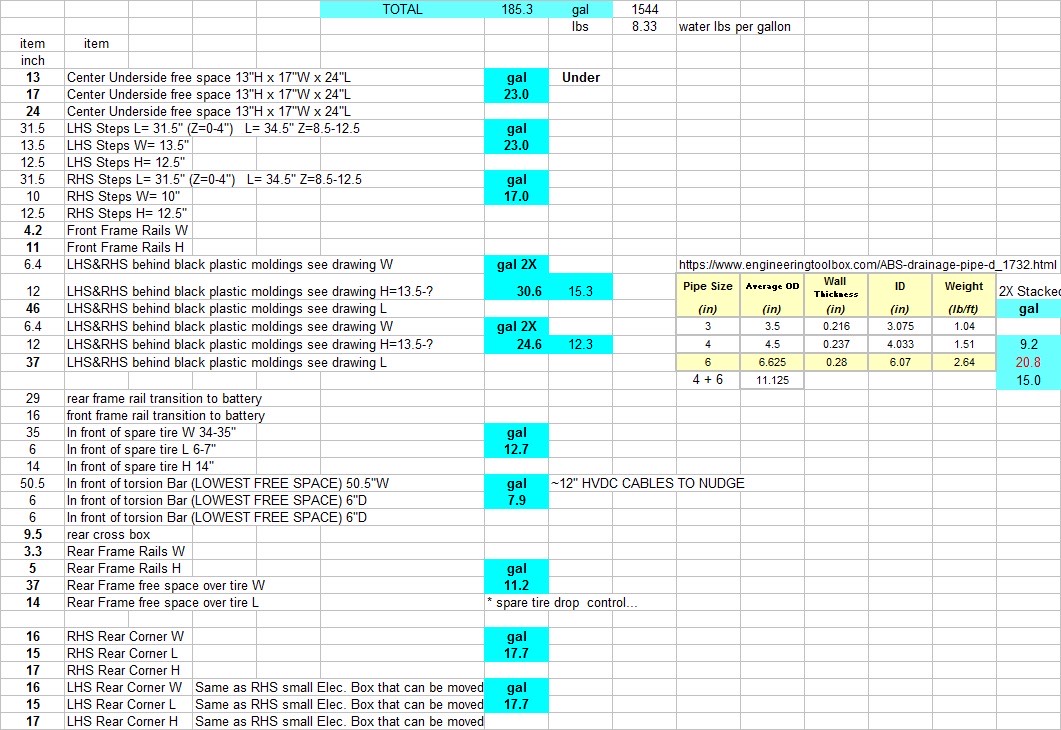
The locked spec: 16 gal fresh (~133 lb full), ~22 gal grey, every tank inside the box — the underfloor is HV territory with 7.51" of clearance. Fresh forward of the rear axle, low and centered; grey may sit further aft; the rear overhang gets the drain penetration only, never mass. Remco Aquajet ARV pump (no accumulator needed), PEX-A throughout, HepvO waterless traps at every drain — nothing to freeze, nothing to slosh. Plumb the winterization loop now, not in November.
Drain routing around the pack — solved by the BrightDrop builder community and validated by Grounded's production RVs. Four floor-exit corridors the battery doesn't own: the ~6" perimeter strip along the body walls, the patch in front of the rear wheel well, under the cab/jump-seat area (Grounded runs its shower drain forward to a 23-gal grey tank under the driver's-seat floor), and our rear overhang. The routing trick: the shower pan sits on the 2" XPS floor layer with a channel routed in the foam for a low-profile drain running laterally above the metal floor — pan drain position is decoupled from the floor hole, the sink tees into the same run, and the build needs one combined exit hole, total, placed in a 191c-checked corridor confirmed against Math Data. Cluster the wet room and galley on one plumbing wall with the water heater under the sink, lateral to the shower valve — 1–2 ft hot lines, no recirculator, no waiting water down the drain. Thermostatic shower valve, low-flow metal head, smooth-bore flex pipe for the grey run.
Walls, ceiling, cabinetry
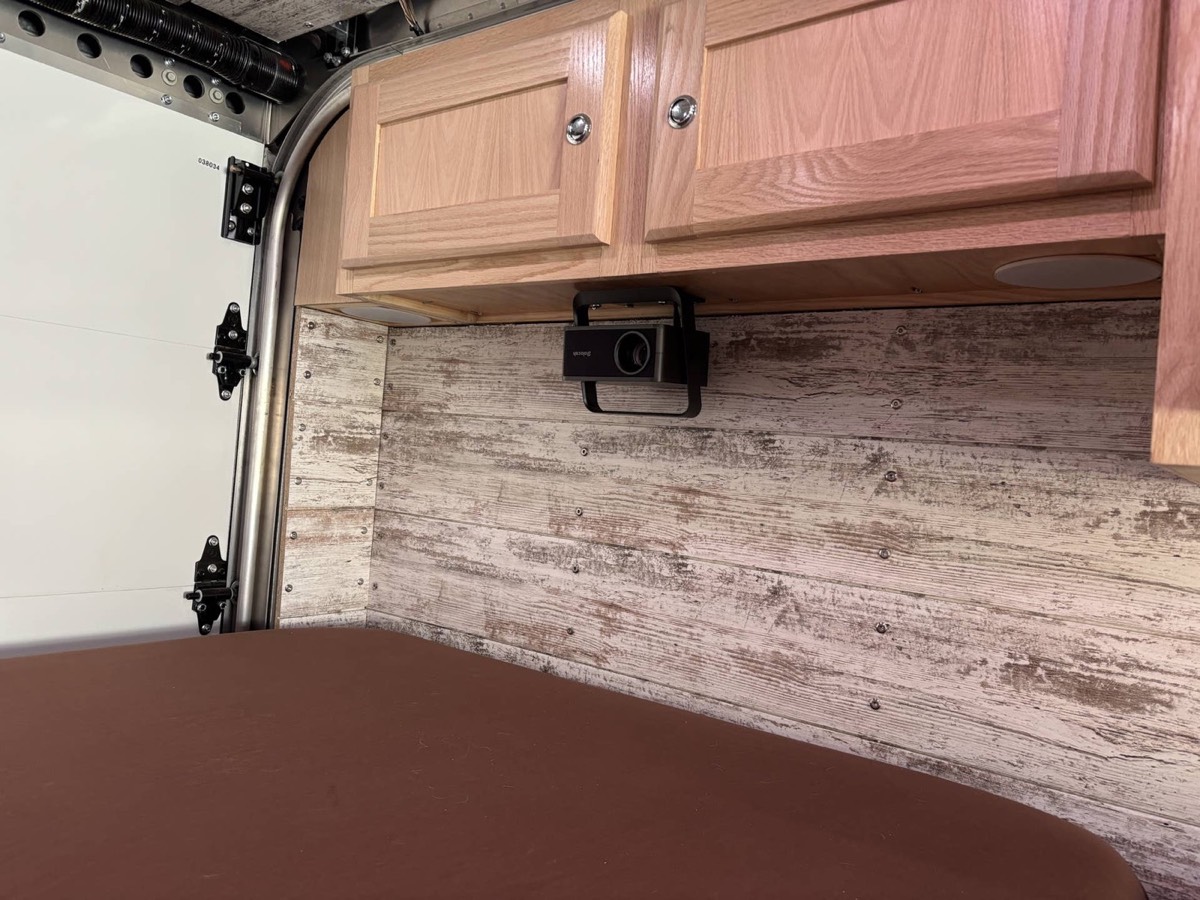
Anchor to the Ranger Design 6550-BZL mounting track — the drill-free, purpose-built attachment for this body — with cabinet frames in thin-wall aluminum. Every cabinet is crash mass: tie every carcass to track or bonded cleat, rated for a stop, not for gravity. Weigh sub-assemblies as they go in and log against the frozen budget — this is where the ~120 lb optimism error historically accumulates. The A/C unit sets into its bench bay as that cabinet is built: the bench is framed around it, ducted to the Phase 4 exhaust path, on the 24 V circuit from Phase 7.
Pet safety & monitoring
The cat is the binding constraint. MarCELL on Verizon (it phones you) as primary, Waggle Pro on AT&T/T-Mobile for carrier diversity, both with internal batteries. Alert on state of charge, not just temperature — wire the power-loss trigger to the house bus. Thermostatic fan circuit on its own isolated supply, so a house-bank fault cannot take ventilation down with it.
Commissioning
- Water: pressure-hold on the fresh side overnight; dye/leak walk on every HepvO joint. No drop, no weep.
- Electrical: full-load inverter test, a real solar harvest day, shore charge through the EMS, 12 V rail under load — numbers must match the design figures.
- Heat: overnight burn at duty cycle, CO detectors live, fuel consumption logged against 0.41 gal/night.
- Pet stack: pull shore power and the main bank breaker; confirm the MarCELL call and Waggle alert both arrive. The phone rings. Actually rings.
- CAT scale, systems in — before final trim. Weigh gate 3. Still under budget with trim + occupants + gear (777 lb) remaining, or trim gets re-scoped now.
- CAT scale, finished and loaded — tanks full, both people, the dog, the cat, the gear. Weigh gate 4. Under 11,000 GVWR and under both GAWRs per axle. This ticket is also Phase 13 paperwork.
- Roof array and rack — put a scheduled visual inspection on the calendar, starting at commissioning. Module faces and backs where they can actually be reached, connectors, wiring and strain relief, mounts and fasteners, corrosion, and any sign of movement. The one owner on this platform with 10,000 miles on an array lost two cells and found them only by looking — nothing at the charge controller flagged it, so controller output does not count as the check. Visible heat damage or a burning odour: stop operating that system, isolate it safely, get it assessed. Do not field-splice around it.
- Shakedown: one week within 100 miles, including two nights off-grid and one DCFC session — the punch list, found near home instead of far from it.
Title and insurance, in exactly this order
Finish the conversion → weight certificate from the loaded CAT scale → photograph the permanently installed systems → file VTR-61 + VTR-130U (Texas wants 4 of 6 life-support systems permanently installed) → motorhome title issues → then, and only then, RV insurance. An RV policy on a commercial title is a claim denial waiting for its moment. Keep the commercial policy live until the day the RV policy binds.
Departure stockpile
Consumables and the real failure points, not fantasy spares: heater clone + glow plug + fuel pump, spare MPPT, water pump head, HepvO cartridges, 08115 + sealant, fuses at every rating on board, filters, and the printed one-line diagram taped inside the electrical cabinet. You cannot stockpile a composite body side — that risk is what the Phase 13 insurance is for.
Field notes from r/VanLife & r/vandwellers
~20 threads mined across both subs. The unexpected find: r/vandwellers hosts an active BrightDrop Zevo camper build — u/salesmountaineer, ex-Sprinter, documenting the whole conversion. Full notes are archived in the research corpus; this is what changes or confirms the manual.
From the one person actually building this van
- Never cover the floor battery-access bolts. Upfitters keep building floors that seal them in. The floating floor in Phase 6 must leave every access bolt reachable — add it to the Phase 3 tape map. (build thread, 383 pts)
- Rivnuts target the aluminum skeleton, never the composite skin alone — a rivnut in bare composite won't hold load. Verify skeleton vs skin at every anchor point before setting.
- He chose 2" R-Tech EPS over polyiso — polyiso is heavier and its R-value collapses below ~50 °F; EPS holds performance in cold. Thinsulate stuffed where board can't fill. The §08 line prices polyiso; run both through the Phase 2 weight rebuild — EPS wins on exactly the two axes this build is constrained on.
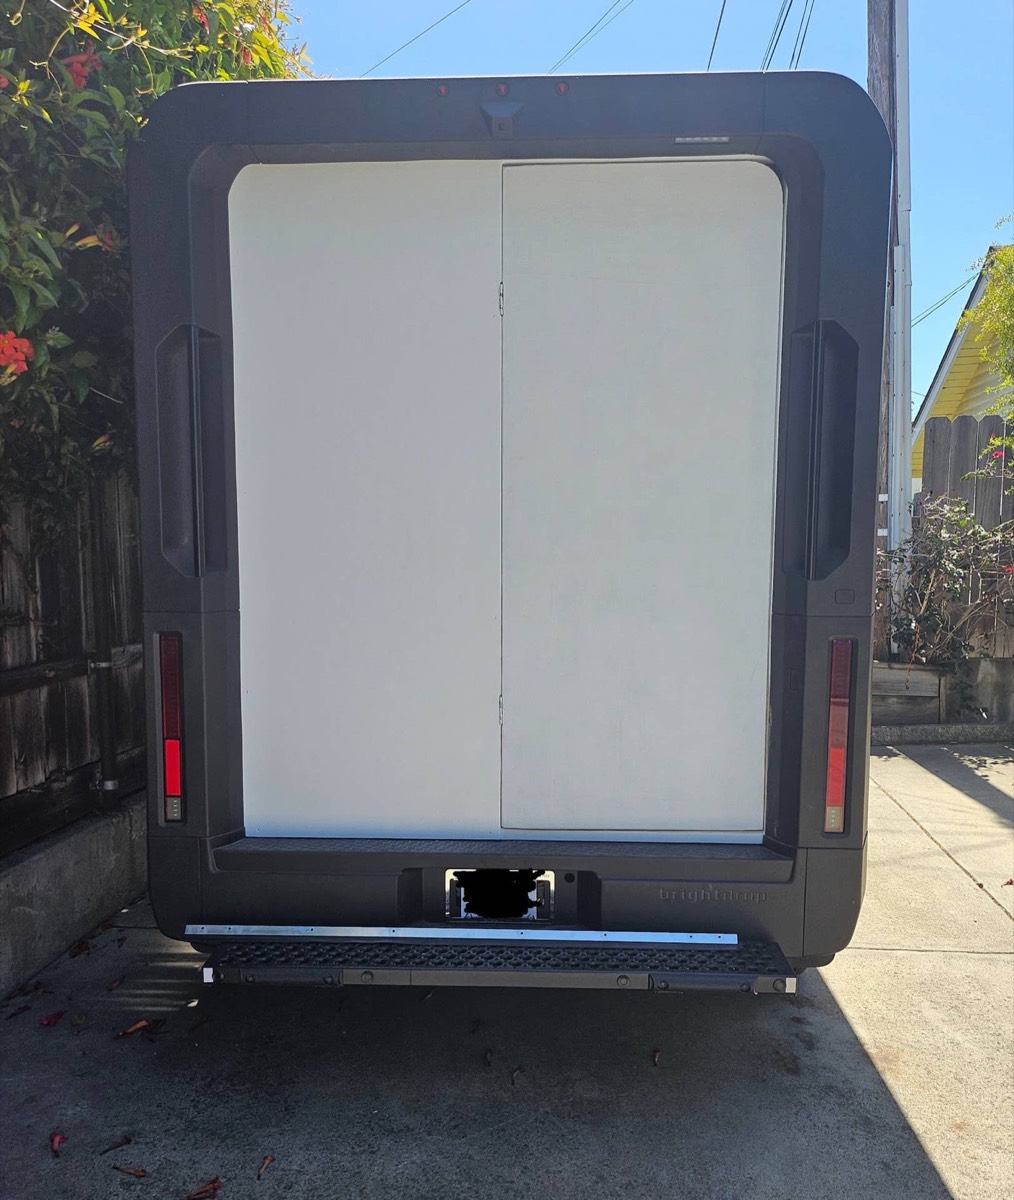
- Watch the gap between the roll-up rear door and the ceiling — 1" of foam may not fit there. Measure in Phase 1.
- Factory sound insulation is nonexistent; the cargo box is all right angles, which makes framing easy; a 7-footer stands inside. Real-world ~300 mi at 55 mph, 65 mph limiter. (discussion thread, 275 comments)
Amendments the manual adopts
- Phase 3–4 addition — set every rivnut/plusnut and run every cable chase before insulation. The two most-repeated regrets on Reddit: blind fasteners not set before paneling, and cross-van cable runs (left↔right, front↔back) not laid before the walls closed. Buy the real setting tool — the ~$70 Astro kit; DIY bolt-method setters fail plusnuts until you give up.
- Phase 9 addition — inline strainer before the pump and rubber isolation mounts. An unmounted pump "sounds like a jackhammer," and there is no engine on this platform to mask it. (The Remco's variable-speed head is why no accumulator is specced — keep that.)
- Phase 10 addition — caulk every cabinet-to-floor edge. Spills migrate under flooring and cabinets you can never access again. Seal every base with caulk or quarter-round, whichever flooring order wins.
- Appliance pick — chest fridge over upright. When power is interrupted, an upright leaks meltwater out the door; a chest keeps cold and water inside. A 5-year full-timer's Isotherm upright is a named regret.
- Phase 11 addition — design the cat's spaces now, not later. Top-entry litter box (the #1 practical tip from cat full-timers), ventilated litter bay near the extraction fan, one dedicated cat-only cubby, and an airlock habit at the doors — a silent EV gives a cat no engine-start warning. Expect ~2 weeks of adjustment; test with driveway overnights first.
- Confirmed, keep as-is: no vapor barrier (Reddit explicitly endorses FarOutRide's guide — "they're engineers"), ventilation over everything, repairable Victron components over sealed all-in-ones (a 5-year full-timer's top regret was a GoalZero he had to mail away for repair), zero-propane galley (induction really draws ~600 W for ~15 min per meal), and the outside-in hole-cutting order.
A VHB-taped panel departed a roof at 70 mph; the consensus is mechanical fastening only — tape is only as strong as the paint it grips. The plan still lands the rack on the M8 rain-gutter studs, which is the mechanical answer; stud capacity is the open item (stage 1). Do not substitute a taped install to save the rack money, ever.
"Add more solar" is the most-repeated regret in ICE-van threads — on a 173 kWh EV with plug charging, roof solar is a supplement, not the backbone, and Reddit's own EV threads agree. Likewise "electric heat eats batteries" is true at 400 Ah/12 V scale and irrelevant here — though the diesel heater stays, because heat that costs $1.60/night without touching range still wins. And the long-termers overwhelmingly say skip the interior shower — mold, water weight, rarely used; a wet locker for gear is the useful version of that space. That is the same call the weight audit already made.